Recover OnePlus Audios
How to Recover Deleted Audio Files from OnePlus Phone
Nowadays, mobile phone play a crucial role in our daily life, whether it is used to make phone calls, listen to music, watch videos, take photos, search for information, and more. If you encounter some unexpected situations, such as the audio on OnePlus being deleted by mistake, especially if the audio is important to you but you don't have any backups. In this situation, you should try to recover deleted audios from OnePlus phone directly.
This article will provide you with a reliable and trusted way to recover deleted audio from OnePlus phone. You cannot directly enter and scan out the deleted data directly, because after deleting the file, the file will be marked as useless and the space can be overwritten. With the help of third-party Android Data Recovery tool, you are able to scan out your lost data directly. The program supports scan and recover lost audios, photos, videos, messages, call logs from different brands from Android phones. Apart from this, the software also provide the function for Samsung user to repair Android system problem like recovery stuck, black screen and more, and you can one-click to backup and restore Android data with ease.
Download and launch Android Data Recovery on the computer, you will see the detailed tips for you to operate the data recovery.


How to Undelete Audios from OnePlus Phone
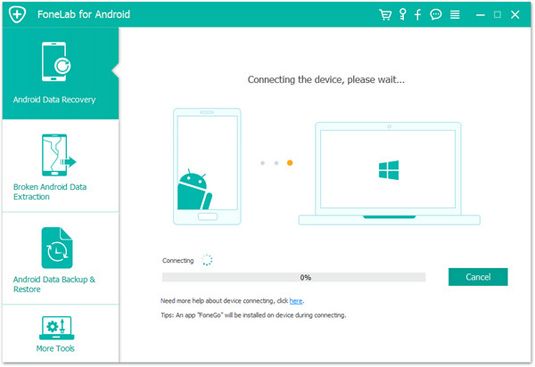
Step 1. Connect OnePlus device to PC
After running Android Data Recovery software on your computer, you will see several options in the windows, select "Android Data Recovery" mode among all the options, then connect your OnePlus device to the same computer with a usb debugging.
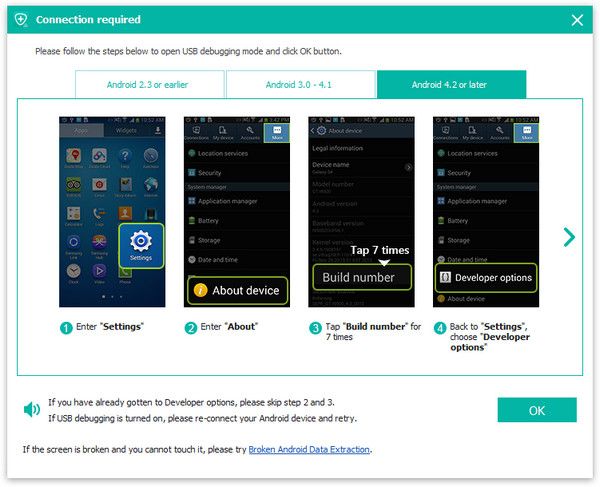
Step 2. Turn on USB debugging
If you turn on USB debugging before, the software will detect your phone, else the Android Data Recovery program will require you to turn on usb debugging.
1. For Android 2.3 or earlier: Enter "Settings" < Click "Applications" < Click"Development" < Check "USB debugging".
2. For Android 3.0 to 4.1: Enter "Settings" < Click "Developer options" < Check "USB debugging".
3. For Android 4.2 or newer: Enter "Settings" < Click "About Phone" < Tap "Build number" for several times until getting a note "You are under developer mode" < Back to "Settings" < Click "Developer options" < Check "USB debugging".
Step 3. Select data type to scan
In the new windows, you will see many data like photo, video, text messages, contacts, ducument, audio and others, now we tap "Audio" and click "Next" button to left the software analyze your phone.

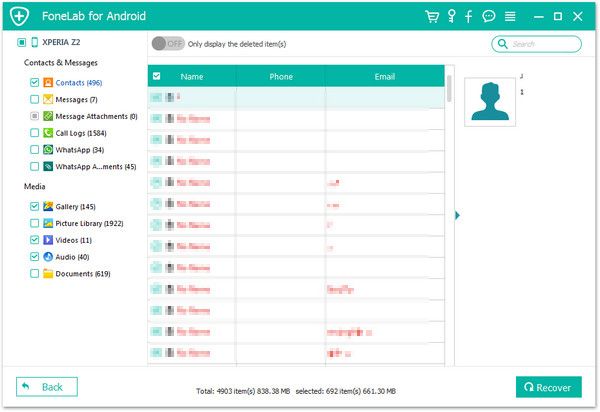
Step 4. Preview and recover audio
After the software finish the process, all audio files will be listed in detail on the scan result, you can preview the existing and deleted audios one by one, you can tap "Only display the deleted item(s)" button to view the deleted ones, then mark all audios you need and click "Recover" button to export them to the computer for use.